Build Overview
Build Name
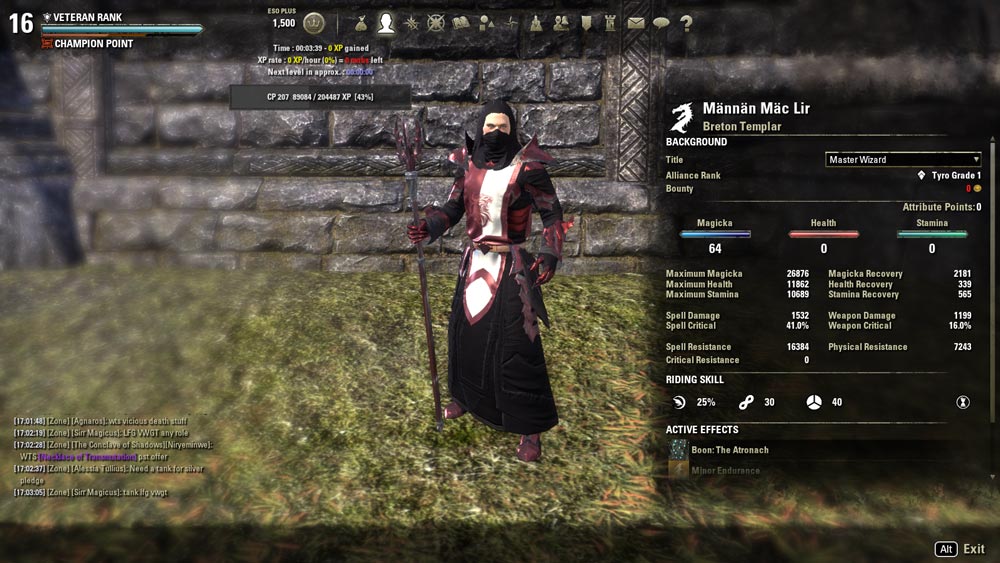
Sun Priest
Intro
Sun Priest is a Healer/DPS Hybrid able to pump out massive heals for the party and be a support DPS when necessary.
Build Objectives
Sun Priest is mainly used as a Healer to protect the party.
Main Focus
This build can be used in all aspects of the game.
Class
Templar
Race – Primary
Breton
Why Choose This Race?
The magicka recovery for the Breton is amazing. I am able to constantly spam group heals without losing magicka.
Attribute Points
- Magica 64
- Health 0
- Stamina 0
Attribute Points Redistribution Explained
The more magicka your character has the more heals/damage it capable of.
Champion Points
The Warrior
69 points at this time, this number will continue to go up as I get more Vets.
The Lady-27 Points in Elemental Defender to take your Elemental Defense to 10% reduction. Hardy-10 points for that reduction.
The Lord-32 Points in Quick Recovery giving the healing to myself a boost.
The Mage
The Apprentice-Blessed 32 points, Elfborn 34 points, Spell Erosion 3 points.
The Thief
The Tower-Magician 33 points, reduces the overall cost of all the spells I cast.
The Lover-Arcanist 36 points, magicka recovery.
Armor and Gear
Armor
I have it set up so that when I am healing Kagrenac’s Hope is the 5 piece set, and when I am DPSing Julianos is the 5 piece set.
- Hat-Julianos
- Shoulders-Julianos
- Belt-Julianos
- Chest-Kagrenac’s Hope
- Gloves-Kagrenac’s Hope
- Pants-Kagrenac’s Hope
- Boots-Kagrenac’s Hope
Jewels
- Willpower Set
Weapons
- Restoration Staff-Kagrenac’s Hope
- Sword and Board-Julianos
Abilities and Passives
Active Skills
- Puncturing Sweep (Aedric Spear)- Frontal AOE DPS, took this morph because it also heals me while doing damage. (Hardly Used anymore)
- Luminous Shards (Aedric Spear)- AOE Targetable cast that Crowd Controls at least one enemy, took this Morph because group players can use the shard to get back both Stamina and Magicka. (Used in Group Dungeons to replenish Tank’s Stamina or DPS Stamina or Magicka)
- Reflective Light (Dawn’s Wrath)- Casted Damage, Morphed for multiple targets (Hardly Used anymore)
- Dark Flare (Dawn’s Wrath)- Single Target Damage, Morphed to deal more Damage and the major Defile reducing targets healing taken by 30% (Main DPS skill does the most Damage as a Templar)
- Purifying Light (Dawn’s Wrath)- Beam of Light over the target that increases the damage of your DPS, this morph heals those in melee range of the target after it ends. (Used on DPS bar when healing as a DPS buff and extra melee heal)
- Total Dart (Dawn’s Wrath)- Bubble that reflects caster and archer attacks back at them, took this morph because the other one doesn’t reflect, I can throw this and go back to healing. (Used as DPS skill in solo and PvP play preventing damage and causing some DPS all its own)
- Radiant Oppression (Dawn’s Wrath)- We call this the Jesus Beam, its a channeled beam that does DPS, took this morph because it does additional damage based on Magicka. (Hardly used anymore)
- Lingering Ritual (Restoring Light)l- This is the main heal, it is a 1.5 sec cast, took this Morph because it has an additional heal 8 seconds after the initial heal. (Main Heal)
- Extended Ritual (Restoring Light)- This is an AOE ground Heal that heals all members that stay within the circle, I took this Morph because it lasts longer. (First skill used in any fight)
- Restoring Focus (Restoring Light)- Protection Rune you stand on, this Morph provides Physical and Spell Resistance and increases healing taken and damage reduction. (Second skill used in any fight)
- Breath of Life (Restoring Light)-Emergency heal, took this Morph because it heals more group members. (Emergency Heal, when cast time would result in death)
- Radiant Aura (Restoring Light)- Group Buff to all recoveries, but while slotted is also a permanent buff to my recoveries. (Always slotted on my heal bar for permanent buff, used as a group buff, kept up as much as possible when with group)
- Combat Prayer (Restoration Staff)- Wave like heal and buff only heals those in front of you in wide swathe, took this Morph because it gives the people in front of me increased damage and Physical and Spell Resistance. (Used in Large groups like Trials and PvP, gives a decent amount of healing but also gives a very nice buff to damage for other players)
- Ward Ally (Restoration Staff)-Bubble shield, took this Morph because it gives me a shield and gives the member with the lowest health a shield. (Used in small group healing like in Dungeons, can actually mean the difference between life and death)
- Inner Light (Mages Guild)- Increases Max Magicka and Magical Crit, and is a way to prevent sneak attacks in PvP. (Always slotted on my DPS bar for permanent buff)
Passive Skills
I have taken all the passives in the Templar Class sections and Racial section, All the passives for Restoration Staff, Sword and Board, and Light Armor.
I have taken all Passives available in Legerdemain and Soul Magic.
I have taken the Fighters Guild and Mage Guild initial passives dealing with NPCs, sometimes this eliminates having to jump through hoops to get to the next part of the quest.
Mundus Stones
The Atronach
Active Skills and Rotation
Bar 1
- Slot 1 – Lingering Ritual
- Slot 2 – Extended Ritual
- Slot 3 – Restoring Focus
- Slot 4 – Ward Ally or Combat Prayer (Activity Dependent)
- Slot 5 – Radiant Aura
- Ultimate – Practiced Incatation
Bar 2
- Slot 1 – Dark Flare
- Slot 2 – Total Dark or Purifying Light (Activity Dependent)
- Slot 3 – Luminous Shards
- Slot 4 – Breath of Life
- Slot 5 – Inner Light
- Ultimate – Shatter Soul
Rotation
Healing-Extended Ritual, Restoring Focus, Radiant Aura, (Bar Swap) Breath of Life {1x or sometimes 2x Sorcerers and Nightblades pull a lot of aggro in the beginning of a fight}, Total Dark on Caster or Archer or Purifying Light on Main DPS target, (Bar Swap) Lingering Ritual spam. Rinse and repeat as needed. You want to keep your ground AOE heal, your ground Protection Rune and the group buffs up as much as possible, you can skip the DPS aspects in the harder aspects of the fight to keep spamming Lingering Ritual. Any DPS aspects you provide are very low on the priority list. And you can cast Luminous shards whenever you can to provide stamina and magicka for your tanks and DPS.
DPS-{Prefight}Extended Ritual, Restoring Focus, Radiant Aura, (Bar Swap) Dark Flare, Luminous Shard on largest group of targets, Total Dark on caster, Dark Flare spam. Rinse and repeat as Total Dark explodes. Breath of Life as needed for emergency heals.
Conclusion
Damage Tips
Keeping that Total Dark on Casters or Archers helps out not just you, but also your whole group, same can be said for the Purifying light. You are not going to do as much damage as any of the other classes, but you can do a fair amount Dark Flare hits like a truck, and you bring off heals to the table. Sometimes having that emergency heal prevents a wipe.
Survivability Tips
Stay in the center of the group so your AOE heals can catch everyone as much as possible. Stay on or near your protection rune.
The Red is not a buff, don’t stand in it. Roll if you must.
Any Other Tips
If someone dies its probably not your fault. The Templar heals are outrageous, but we can’t heal stupid…lol.
 (0 votes, average: 0.00 out of 5)
You need to be a registered member to rate this post.